Introduction
Docker Swarm allows us to provide High Availability services for our clients. This article will show some recommendations and necessary examples to achieve services with this feature.
Requirements
Have Docker and Docker Machine installed.
Have a cluster configured using Docker Swarm with Docker Machine with a total of 6 nodes (3 manager and 3 worker). This requirement can be achieved using the scripts published in the article Docker Swarm with Docker Machine, Scripts in this site.
Environment settings
$ docker version
Client:
 Version:      17.11.0-ce
 API version:  1.34
 Go version:   go1.8.3
 Git commit:   1caf76c
 Built:        Mon Nov 20 18:37:39 2017
 OS/Arch:      linux/amd64

Server:
 Version:      17.11.0-ce
 API version:  1.34 (minimum version 1.12)
 Go version:   go1.8.3
 Git commit:   1caf76c
 Built:        Mon Nov 20 18:36:09 2017
 OS/Arch:      linux/amd64
 Experimental: false
Source code
The source code used in this article is published on GitHub.
High Availability Services
When you have services published in production environments your priority should be to provide these services continuously and without interruptions. In order to achieve this objective, the infrastructure of its systems must be prepared to recover from both physical failures and software components without the user being affected.
High Availability (HA) is the quality of a system or component that ensures a high level of operational performance for a certain period of time.
Preparing our machine
Commands from Docker Client to Local Swarm
For the next steps we need that our Docker Client make the requests to the cluster created with Docker Machine. To achieve this, we must establish that the requests are always made from our Docker Client to the Docker Server that is running on node1 of the cluster. Let’s use the following command:
$ eval $(docker-machine env node1)
Check that the change has been made correctly listing the nodes created with Docker Machine, the node1 should be active.
$ docker-machine ls
NAME    ACTIVE   DRIVER       STATE     URL                         SWARM   DOCKER        ERRORS
node1   *        virtualbox   Running   tcp://192.168.99.100:2376           v17.11.0-ce
node2   -        virtualbox   Running   tcp://192.168.99.101:2376           v17.11.0-ce
node3   -        virtualbox   Running   tcp://192.168.99.102:2376           v17.11.0-ce
node4   -        virtualbox   Running   tcp://192.168.99.103:2376           v17.11.0-ce
node5   -        virtualbox   Running   tcp://192.168.99.104:2376           v17.11.0-ce
node6   -        virtualbox   Running   tcp://192.168.99.105:2376           v17.11.0-ce
If you want to increase the information regarding the Docker Architecture you can consult this link.
Docker Swarm from the browser
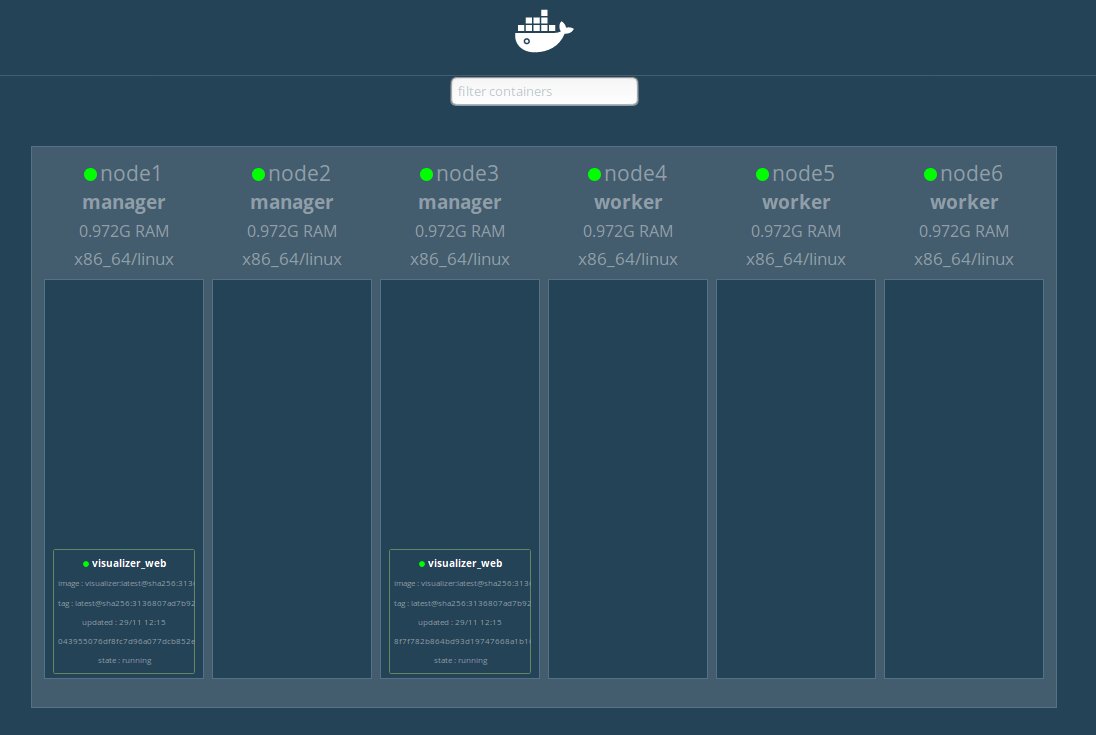
We will use the Docker Swarm Visualizer project to see our Swarm from the browser. To achieve this we will use the file visualizer.yml located in the stacks folder of the repository. The command to publish this service would be as follows:
$ docker stack deploy --compose-file=stacks/visualizer/visualizer.yml visualizer
Let’s check if the service was deployed correctly:
$ docker stack services visualizer
ID                  NAME                MODE                REPLICAS            IMAGE                             PORTS
qxm4w28xr4la        visualizer_web      replicated          2/2                 dockersamples/visualizer:latest   *:8080->8080/tcp
Then we access our browser using the IP of node1 (192.168.99.100) and the port 8080.
Setting local DNS
Let’s group the different IP addresses of our nodes under a single web address. The web address to be used will be swarm.local and we must add it together with the IPs of the Docker machines in the /etc/hosts file.
To edit the file you can use the command:
$ sudo vim /etc/hosts
Add the following data to the file:

Once the file is saved, we can access the systems displayed in the Swarm through the link http://swarm.local/, such as Visualizar Swarm.
Our app or service
We will use DockerCloud’s Hello-World as an application, which will be deployed through port 80.
We will use this application to identify some problems that could lead to service interruptions for our clients. We will also see the suggested solution that we can implement using the benefits of Docker Swarm.
The possible disaster situations to be resolved will be:
- Software rupture.
- Overload of orders to a service.
- Infrastructure or hardware problems.
Software rupture
The published product is not perfect and, therefore, unexpected interruptions could occur due to situations such as: overload of users accessing the site at the same time, the identification of a bug or critical case, the demand for higher values of RAM or CPU, among others.
The solution before these possible problems is to create multiple instances of our application to continue providing the services even if one or several of them are not available.
Docker Swarm will allow us to create multiple instances of the same service easily. The following configuration will allow us to deploy our system and will be able to easily identify how the two replicas of the service are specified.
The file with the configuration can be found in the stacks folder with the name dockercloud-hello-world.yml.
version: '3.4'
services:
  web:
    image: dockercloud/hello-world
    ports:
      - target: 80
        published: 80
        protocol: tcp
        mode: ingress
    deploy:
      mode: replicated
      replicas: 2
Let’s start the service with the following command:
$ docker stack deploy --compose-file=stacks/dockercloud-hello-world/dockercloud-hello-world.yml dc-helloworld
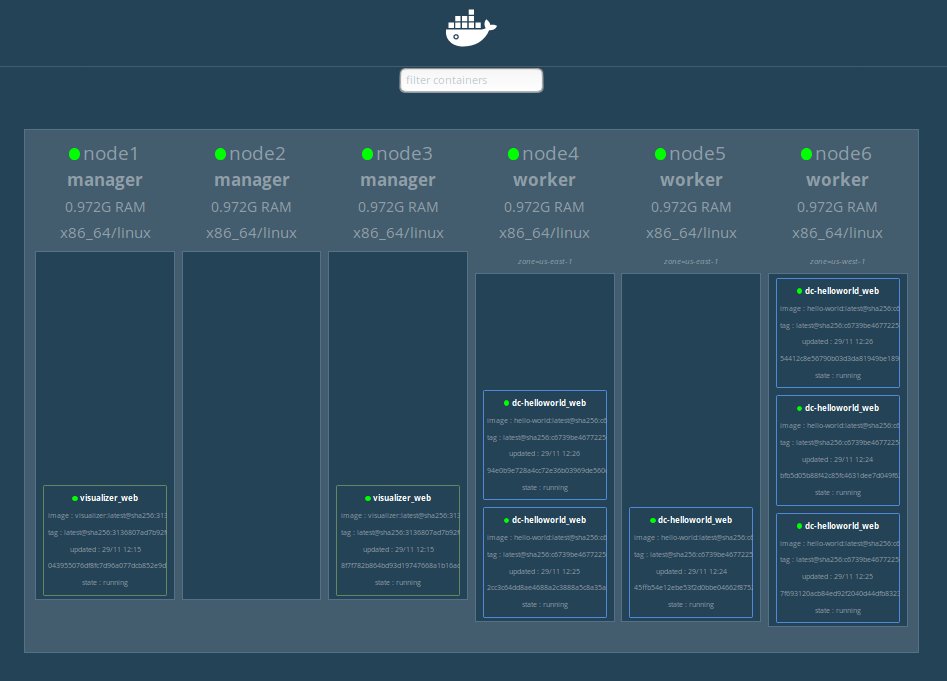
Let’s update our Visualizer application and we’ll see something similar to the following image:
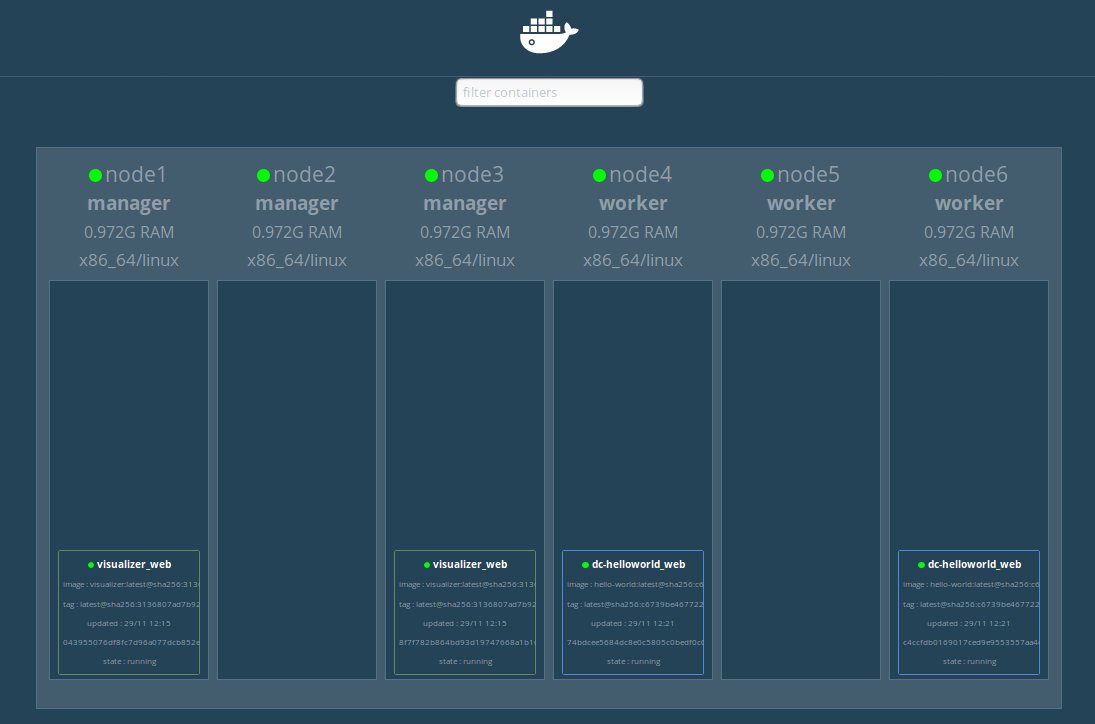
If we access this link we can see the Hello World application. If you update a couple of times the browser you will see how the name of the container changes indicating that both instances are available.

Overload of orders to a service
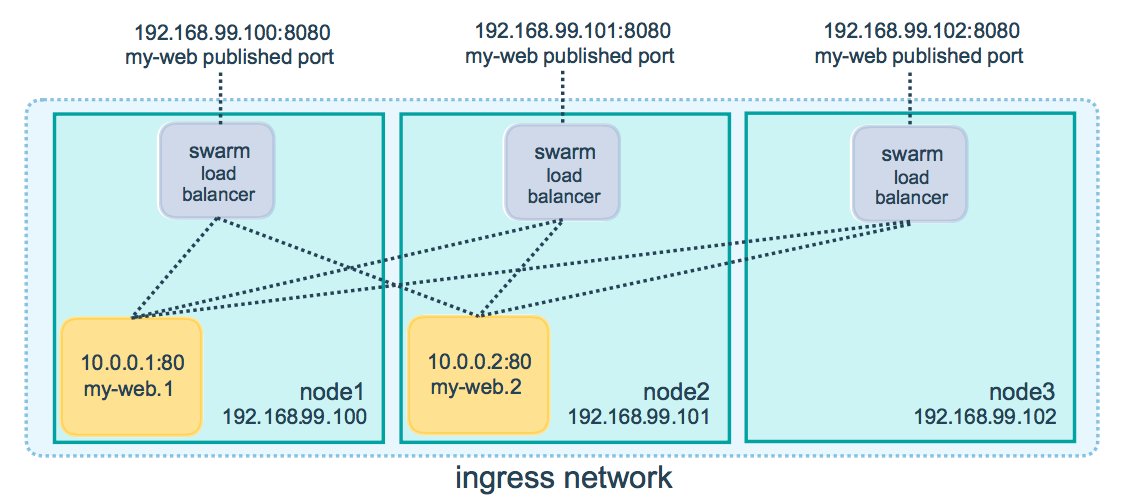
When we have multiple instances of the same service, we need to balance the load that arrives at them so that none is saturated in requests. Luckily for us, Docker Swarm solves this problem for us because it has a system to balance the load within its own core.
As this load balance is in the core of Docker we have the guarantee that each node has one of these systems. Therefore, if any of the nodes stops working, the Swarm will be able to continue distributing the requests to the instances with less demand.
To consult more information about it you can consult this link.
Infrastructure or hardware problems
The virtual machines of our infrastructure are physically located in an availability zone. If all our nodes are in the same zone and a network or hardware problem occurs, all Swarm services will be interrupted, for this reason, this is another element to be taken into account.
So far we are clear that our nodes should be created in different areas of availability but the next question would be:
How do we configure our Swarm so that it publishes the services establishing a balance between the different physical zones?
The answer is adding Tags to the nodes and Restrictions in the deployment of the services. Let’s see an example in the following steps.
Add tags to nodes
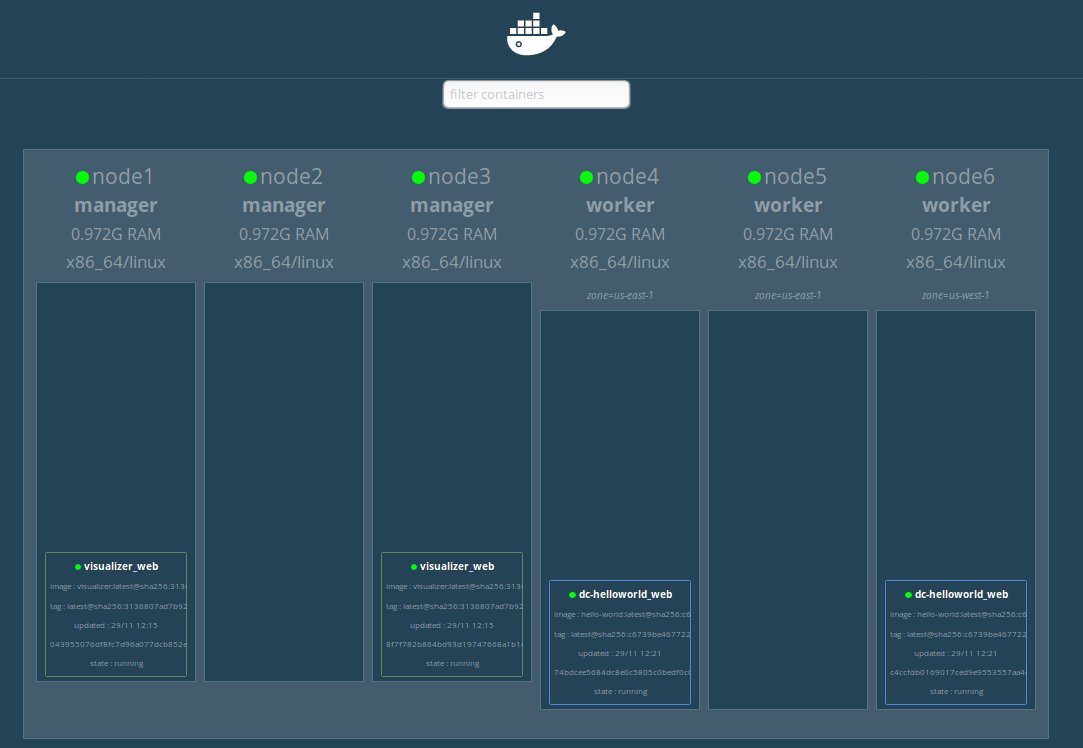
In the example, just the 3 Worker nodes will be used and they will be distributed in 2 physical zones: us-east-1 and us-west-1. The commands to add the tags to the nodes are:
$ docker node update --label-add zone=us-east-1 node4
$ docker node update --label-add zone=us-east-1 node5
$ docker node update --label-add zone=us-west-1 node6
Add constraints to the service
Let’s configure the file dockercloud-hello-world.yml where the following elements will be added:
- Use only the worker nodes.
- Propagation strategy using the tags
node.labels.zone. - Create 6 replicas of the service.
version: '3.4'
services:
  web:
    image: dockercloud/hello-world
    ports:
      - target: 80
        published: 80
        protocol: tcp
        mode: ingress
    deploy:
      mode: replicated
      replicas: 6
      placement:
        preferences:
          - spread: node.labels.zone
        constraints:
          - node.role == worker
Update the service deployed
Let’s move on to update our service with the new configurations. To achieve this we must use the same command used during the creation of it.
$ docker stack deploy --compose-file=stacks/dockercloud-hello-world/dockercloud-hello-world.yml dc-helloworld
Conclusions
Providing services with High Availability is not an easy task, but neither is it impossible. With this article you have at hand some suggestions and advice to establish High Availability services using Docker Swarm.


